

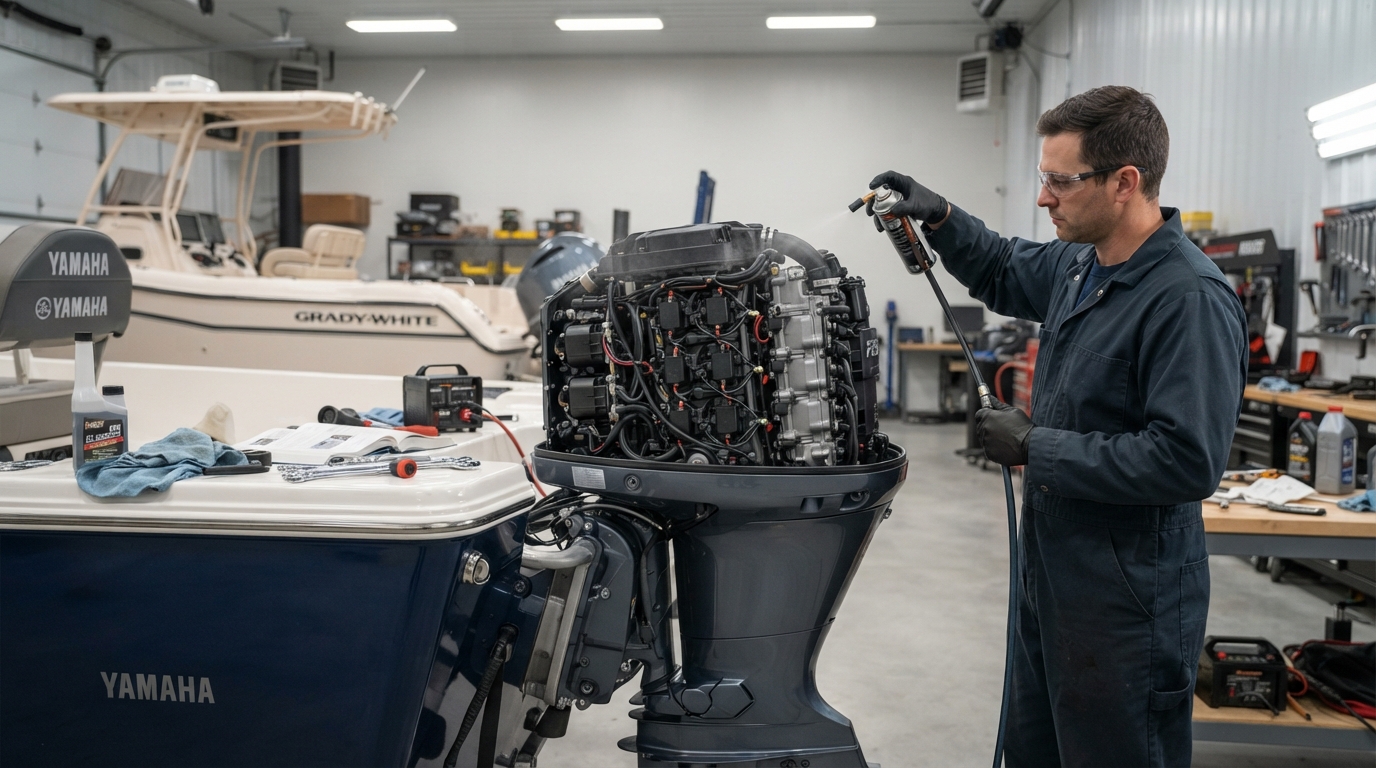
If you own a boat with a four-stroke outboard, proper seasonal storage can make a major difference in how easily the engine starts and performs when boating season returns. Learning how to winterize a 4 stroke outboard motor is especially important when the engine will sit unused for several weeks or months.
Winterization is more than simply covering the motor and leaving the boat in storage. Fuel can deteriorate, moisture can encourage corrosion, engine oil can become contaminated, and water left in vulnerable areas can create problems in freezing conditions. Even in regions without severe winter temperatures, extended storage still deserves careful preparation.
The good news is that most of the process is straightforward when you follow the manufacturer’s recommendations.
In this guide, you’ll learn how to winterize a 4 stroke outboard motor step by step, including fuel preparation, oil changes, cooling-system care, corrosion protection, gearcase maintenance, battery storage, and spring recommissioning.
Quick answer: To winterize a 4-stroke outboard, follow the manufacturer’s storage procedure, stabilize the fuel, change the engine oil and filter, flush the cooling passages, protect internal and external components from corrosion, inspect the gearcase and propeller, maintain the battery, and store the motor in the recommended position. Always follow the specific owner’s manual because procedures differ between brands and models.
What Does Winterizing a 4-Stroke Outboard Motor Mean?
Winterizing means preparing an outboard engine for a period when it will not be used.
The process is designed to reduce problems caused by:
- Old or degraded fuel
- Moisture and condensation
- Corrosion
- Contaminated engine oil
- Water remaining in the cooling system
- Low or discharged batteries
- Gearcase lubricant problems
- Dirt, salt, and mineral deposits
- Improper storage position
- Rodents or other environmental exposure
A four-stroke engine has an engine lubrication system, crankcase oil, an oil filter, fuel injectors or other fuel-system components, and several systems that require attention during storage. Therefore, proper winterization involves more than simply draining fuel.
The exact procedure depends on the engine manufacturer, model, horsepower, fuel system, and storage conditions.
For example, the recommended procedure for a modern electronically fuel-injected outboard may differ from an older carbureted engine. That’s why the owner’s manual should always be your primary reference.
how to winterize a 4 stroke outboard motor
Why Winterizing Your Outboard Motor Matters
A boat engine may look perfectly fine when you shut it down at the end of the season. Problems can develop while it sits unused, however.
Fuel deterioration
Gasoline can degrade during extended storage. Modern fuel systems can also be sensitive to contamination and moisture.
Fuel problems may cause:
- Hard starting
- Rough running
- Poor acceleration
- Reduced performance
- Fuel-system deposits
- Injector problems
Using the correct fuel stabilizer according to the product and engine manufacturer’s directions can help reduce storage-related fuel problems.
Corrosion
Marine engines operate around water, and saltwater environments are especially demanding.
Salt deposits and moisture can contribute to corrosion on metal components. Corrosion protection is therefore an important part of learning how to winterize a 4 stroke outboard motor correctly.
Oil contamination
Used engine oil can contain contaminants and combustion byproducts. Leaving old oil in the engine throughout a long storage period is generally not the preferred approach when the manufacturer recommends changing it before storage.
Fresh oil provides a clean starting point for the next season.
Freezing conditions
Water remaining in parts of an engine can become a concern in freezing climates.
Many outboards are designed to drain water naturally when positioned correctly, but that does not mean you should ignore the manufacturer’s storage-position instructions.
Battery discharge
A battery that remains connected and unused for months can lose charge. A weak battery can turn the first boating day of spring into a frustrating experience.
How to Winterize a 4 Stroke Outboard Motor
The following procedure provides a general framework for how to winterize a 4 stroke outboard motor.
Before beginning, gather the supplies recommended for your specific engine.
Typical items may include:
- Manufacturer-approved engine oil
- Correct replacement oil filter
- Gearcase lubricant
- New gearcase drain/fill washers or seals if specified
- Fuel stabilizer approved for your fuel system
- Corrosion-inhibiting marine spray
- Grease recommended by the manufacturer
- Oil-drain equipment
- Basic hand tools
- Appropriate flushing equipment
- Clean rags
- Gloves
- Battery charger or maintainer
- Propeller-shaft grease
- Owner’s manual
Do not assume that one product or procedure is suitable for every outboard. Always verify fluid specifications, quantities, service intervals, and storage procedures in the manual for your particular engine.
Step 1: Check the Owner’s Manual
The first step in learning how to winterize a 4-stroke outboard motor is surprisingly simple: read the manufacturer’s storage instructions.
This matters because outboard engines are not identical.
The manual may specify:
- Oil type and viscosity
- Oil capacity
- Filter specification
- Gearcase lubricant
- Fuel-storage procedure
- Fogging or internal corrosion-protection procedure
- Grease points
- Battery requirements
- Storage position
- Cooling-system procedure
- Spring startup requirements
Some newer engines use manufacturer-specific procedures for protecting internal components. Following a generic internet guide instead of the manual can result in an incorrect procedure.
Why manufacturer instructions come first
A 20-horsepower four-stroke and a 300-horsepower four-stroke may both be outboard engines, but their service procedures can be very different.
Use general guides like this one to understand the process, but use your owner’s manual for the final specifications.
Step 2: Prepare the Fuel System
Fuel preparation is one of the most important parts of how to winterize a 4 stroke outboard motor.
For many modern outboards, completely draining the boat’s fuel tank is not necessarily the recommended approach. Instead, manufacturers may recommend stabilizing fuel and following a specific storage procedure.
Add the correct fuel stabilizer
If your engine manufacturer recommends fuel stabilizer, use a product appropriate for the fuel system and follow its dosage instructions.
The general process is:
- Determine the amount of fuel in the tank.
- Calculate the correct stabilizer quantity.
- Add the stabilizer according to the product instructions.
- Run the engine according to the manufacturer’s procedure so treated fuel reaches the appropriate components.
Do not guess the dosage.
how to winterize a 4 stroke outboard motor
Why treated fuel matters
Fuel stabilizer is intended to help fuel remain suitable for storage. It does not repair severely contaminated or already degraded gasoline.
If you suspect the fuel is contaminated, has separated, or contains water, consult a qualified marine technician before storing the engine.
Avoid unnecessary fuel-system experimentation
Do not add random additives simply because someone recommends them online.
Use only products that are compatible with your engine and fuel system. Follow the owner’s manual and product label.
Step 3: Change the Engine Oil and Filter
Changing engine oil is a central part of how to winterize a 4 stroke outboard motor.
Used oil can contain contaminants from normal engine operation. Replacing it before extended storage gives the engine fresh lubricant when it sits and when it is started again.
General oil-change process
A typical process is:
- Warm the engine according to the manufacturer’s instructions.
- Shut the engine down safely.
- Secure the boat and engine.
- Drain the old oil using the recommended procedure.
- Replace the oil filter if the service procedure calls for it.
- Lubricate the new filter gasket if specified.
- Install the filter correctly.
- Add the manufacturer’s recommended oil.
- Check the oil level.
- Inspect for leaks.
The exact procedure varies by engine.
Use the correct oil
Do not choose engine oil based only on viscosity.
Check the owner’s manual for:
- Viscosity
- Marine-specific requirements
- Performance standards
- Recommended brand or specification
- Oil capacity
Using the correct lubricant is part of proper engine maintenance.
Dispose of used oil responsibly
Never pour used engine oil onto the ground, into a drain, or into waterways.
Collect it in an appropriate container and take it to a facility that accepts used motor oil.
Step 4: Flush and Protect the Cooling System
The cooling system is another important consideration when you learn how to winterize a 4 stroke outboard motor.
During normal operation, an outboard pumps water through its cooling passages. If the boat has been used in saltwater, brackish water, or dirty water, flushing can help remove deposits and contaminants.
Flush the engine correctly
Follow the manufacturer’s flushing procedure.
Depending on the engine, you may use:
- A flushing attachment
- A suitable freshwater connection
- Another manufacturer-approved flushing method
Never operate the engine without an appropriate water supply.
Saltwater engines need extra attention
Saltwater can leave mineral and salt deposits inside and around cooling passages.
Freshwater flushing after saltwater operation is a valuable maintenance practice, not merely a winterization task.
Allow appropriate drainage
After flushing, follow the manufacturer’s instructions for draining water and positioning the motor.
Do not assume that manually blowing compressed air through the cooling system is appropriate. Some manufacturers have specific procedures, while others do not recommend certain methods.
Step 5: Protect the Engine From Corrosion
Corrosion protection is especially important for boats used in marine environments.
A suitable marine corrosion-inhibiting product can help protect exposed metal surfaces and other components, but the product must be applied according to the manufacturer’s instructions.
Where corrosion can develop
Pay attention to areas such as:
- Fasteners
- Brackets
- Linkages
- Electrical connections
- Exposed metal surfaces
- Steering components
- Control mechanisms
- Engine mounting areas
Do not spray products indiscriminately over:
- Belts
- Friction surfaces
- Brake-like components
- Electrical connectors that require specialized treatment
- Air intake areas
- Hot engine surfaces
Always check the product instructions.
Internal corrosion protection
Some engines have specific manufacturer-approved procedures for internal storage protection.
This is one area where a generic article should not replace the owner’s manual.
If the manual instructs you to use a particular fogging or internal storage method, follow it exactly.
Step 6: Change the Gearcase Lubricant
The lower unit, commonly called the gearcase, contains gears and bearings that rely on gear lubricant.
Changing the lubricant before long-term storage can help identify problems before the engine is stored.
Why inspect the old lubricant?
When draining gearcase lubricant, pay attention to its appearance.
Healthy lubricant should generally have the expected appearance for the product. A milky or unusually cloudy appearance can indicate the presence of water.
Metal particles or unusual debris may also indicate a problem.
If you notice anything suspicious, have the gearcase inspected by a qualified marine technician.
General gearcase service
A typical service involves:
- Positioning the engine according to the manual.
- Removing the appropriate drain and vent plugs.
- Inspecting the old lubricant.
- Allowing the old lubricant to drain completely.
- Replacing sealing washers or gaskets if required.
- Filling with the specified gear lubricant using the correct procedure.
- Reinstalling the plugs to the specified tightness.
- Checking for leaks.
Do not substitute automotive differential fluid or another lubricant unless the manufacturer specifically approves it.
Step 7: Inspect the Propeller and Propeller Shaft
The propeller deserves attention during winter storage.
Remove the propeller if recommended by the manufacturer or service procedure and inspect it for damage.
Look for:
- Bent blades
- Cracks
- Excessive corrosion
- Fishing line
- Worn hardware
- Damaged hub components
- Unusual shaft-area debris
Fishing line is particularly important because it can become wrapped around the propeller shaft and potentially affect the propeller-shaft seal.
Grease the propeller shaft
If the manufacturer’s maintenance schedule calls for it, clean the shaft and apply the recommended marine grease before reinstalling the propeller.
Do not overapply grease.
Inspect the propeller hardware and make sure everything is installed correctly.
Step 8: Check the Battery and Electrical System
A battery can gradually discharge during long periods of inactivity.
Battery maintenance is therefore an important part of how to winterize a 4 stroke outboard motor.
Battery storage options
Depending on the manufacturer’s recommendations and your storage environment, you may:
- Remove the battery
- Disconnect it
- Keep it installed with appropriate maintenance
- Connect it to a suitable battery maintainer
If you remove the battery, store it in a clean, dry location appropriate for battery storage.
Inspect the terminals
Check the battery terminals and cables for:
- Corrosion
- Loose connections
- Damaged cables
- Dirt
- Signs of overheating
Clean and maintain them according to the battery and boat manufacturer’s instructions.
Use the correct charger
A quality marine-compatible battery maintainer can help maintain charge during storage.
Do not use an unsuitable charger or leave charging equipment connected in an unsafe environment.
Follow the charger manufacturer’s safety instructions.
Step 9: Store the Motor in the Correct Position
Correct storage position is one of the most overlooked aspects of how to winterize a 4 stroke outboard motor.
An outboard should generally be positioned according to the manufacturer’s storage instructions.
This can be particularly important in freezing weather because the engine needs to drain water appropriately.
Why position matters
If water remains in a location where it can freeze and expand, components may be damaged.
Many outboard designs are engineered to drain when stored in a particular position, but you should never rely on assumptions.
Check the owner’s manual for:
- Recommended storage position
- Tilt requirements
- Trailer position
- Freezing-weather precautions
- Long-term storage instructions
If the manufacturer says the engine should be vertical for storage, follow that instruction.
Step 10: Protect the Exterior and Controls
Once the mechanical work is finished, clean the engine and inspect its exterior.
Remove:
- Salt deposits
- Dirt
- Mud
- Grease
- Debris
- Water residue
Dry appropriate surfaces and apply manufacturer-approved protective products where recommended.
Inspect control systems
Check:
- Throttle movement
- Shift mechanism
- Steering components
- Cables
- Hydraulic steering components
- Mounting hardware
- Electrical connections
Any stiffness, unusual play, corrosion, or damage should be investigated before the next season.
Winterizing Checklist
Use this checklist as a general reminder. Your engine’s owner’s manual takes priority.
- Read the manufacturer’s storage instructions.
- Inspect the engine for damage or leaks.
- Prepare fuel according to manufacturer recommendations.
- Add approved fuel stabilizer if required.
- Run treated fuel through the system if instructed.
- Change engine oil.
- Replace the oil filter when required.
- Flush the cooling system correctly.
- Allow the engine to drain according to instructions.
- Protect internal components using the approved procedure.
- Inspect and service gearcase lubricant.
- Check for signs of water contamination.
- Inspect the propeller.
- Remove fishing line or debris.
- Grease the propeller shaft if required.
- Inspect battery condition.
- Maintain or store the battery correctly.
- Check electrical connections.
- Lubricate specified grease points.
- Inspect steering and shift components.
- Clean salt and dirt from the engine.
- Store the outboard in the manufacturer’s recommended position.
- Protect the engine from weather and environmental exposure.
- Record maintenance performed.
Common Winterization Mistakes
Knowing what not to do is just as useful as knowing how to winterize a 4-stroke outboard motor.
1. Ignoring the owner’s manual
A generic procedure may not match your particular engine.
Better approach: Use general guidance to understand the process, then follow your manufacturer’s specific requirements.
2. Leaving old oil in the engine
Long-term storage is an ideal time to complete an oil change when recommended by the manufacturer.
Better approach: Change the oil and filter according to the service schedule.
3. Forgetting the gearcase
Some owners focus entirely on the engine and ignore the lower unit.
Better approach: Inspect and replace gearcase lubricant according to the manufacturer’s maintenance schedule.
4. Failing to inspect for water contamination
Water in gearcase lubricant can indicate a seal problem.
Better approach: Inspect drained lubricant and investigate unusual appearance.
5. Storing the motor incorrectly
Incorrect positioning can be especially problematic in freezing climates.
Better approach: Follow the manufacturer’s storage-position instructions.
6. Using the wrong lubricants
Not every oil or grease is appropriate for marine engines.
Better approach: Use the specified products and quantities.
7. Forgetting the battery
A battery can lose charge during storage.
Better approach: Maintain it using an appropriate charger or storage procedure.
8. Covering a dirty engine
Salt and dirt left on the engine can continue affecting surfaces during storage.
Better approach: Clean and inspect the engine before covering it.
9. Using a cover that traps moisture
Protection from rain is useful, but excessive trapped moisture can create another problem.
Better approach: Use appropriate ventilation and a cover designed for the storage environment.
10. Treating every outboard the same
This is perhaps the biggest mistake.
A procedure suitable for one engine may not be correct for another.
Professional Winterization vs. DIY
Many owners can perform basic seasonal maintenance themselves, but professional service can make sense in certain situations.
DIY winterization may be suitable when:
- You have the correct tools.
- You understand the manufacturer’s instructions.
- The engine is relatively accessible.
- You are comfortable changing oil and gear lubricant.
- You can safely handle the boat and engine.
- You know how to identify potential problems.
Professional service may be better when:
- The engine has an unknown maintenance history.
- You find water in the gearcase lubricant.
- There are electrical problems.
- The engine has warning lights or fault codes.
- The engine has been submerged.
- There is significant corrosion.
- The engine will be stored in severe winter conditions.
- You are unsure about internal corrosion-protection procedures.
- The manufacturer’s procedure requires specialized equipment.
A professional winterization service can also provide an opportunity for a broader inspection.
How Long Does It Take to Winterize a 4-Stroke Outboard?
The time depends on the engine, the maintenance required, your experience, and whether you are servicing only the outboard or the entire boat.
A basic procedure may involve several maintenance tasks, including:
- Engine inspection
- Fuel preparation
- Oil and filter service
- Cooling-system flushing
- Gearcase inspection
- Propeller inspection
- Battery maintenance
- Corrosion protection
Do not rush the process simply to finish faster.
A careful inspection can reveal problems that might otherwise remain hidden until spring.
Can You Winterize an Outboard Without Removing It?
In many cases, yes.
An outboard generally does not need to be removed from the boat simply for seasonal winterization.
The important issue is having safe access to the engine and following the manufacturer’s procedure.
If the boat itself is being stored on a trailer, dry stack, lift, or in the water, storage requirements can differ.
For freezing conditions, confirm how the manufacturer wants the engine positioned.
How to Prepare the Outboard for Spring
Winterization does not end when the engine is put away.
Before launching the boat again, perform a careful spring inspection.
1. Inspect the engine
Look for:
- Leaks
- Corrosion
- Damaged wiring
- Loose hardware
- Rodent damage
- Cracked hoses
- Damaged fuel lines
2. Reinstall the battery
If the battery was removed, inspect it and reinstall it correctly.
Confirm that connections are clean and secure.
3. Check engine oil
Verify the oil level according to the manufacturer’s procedure.
Do not overfill.
4. Inspect gearcase lubricant
Check for leaks or unusual signs around the gearcase.
5. Inspect the propeller
Make sure the propeller is properly installed and secure.
6. Check fuel
Confirm that the fuel system is in suitable condition.
If fuel has been stored for a long time or contamination is suspected, address the issue before starting the engine.
7. Start the engine correctly
Follow the manufacturer’s startup procedure.
Make sure the engine has an adequate water supply when required.
Do not run an outboard without the appropriate cooling-water supply.
8. Watch for warning signs
After startup, pay attention to:
- Warning alarms
- Unusual noises
- Excessive vibration
- Oil leaks
- Fuel leaks
- Cooling-water indications
- Abnormal smoke
- Poor idle quality
If something appears wrong, shut the engine down safely and investigate the problem.
Best Practices for Long-Term Outboard Storage
The best way to approach how to winterize a 4 stroke outboard motor is to think beyond a single winter.
Create a simple maintenance record containing:
- Engine hours
- Oil-change date
- Gearcase service date
- Spark-plug service
- Battery condition
- Propeller inspection
- Fuel treatment
- Corrosion protection
- Repairs needed
- Parts replaced
This makes seasonal maintenance easier.
It also gives you useful information when diagnosing problems later.
Keep replacement parts organized
If you replace the oil filter, sealing washers, or other service items, record the part numbers.
This avoids confusion during the next service.
Don’t postpone known repairs
If you notice a damaged seal, cracked hose, unusual corrosion, or gearcase issue during winterization, don’t simply write it down and forget about it.
Address the issue before the next boating season when practical.
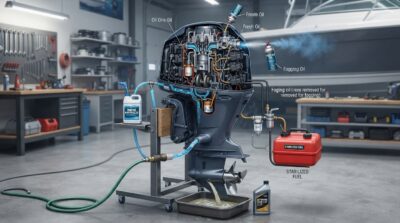
how to winterize a 4 stroke outboard motor
FAQ
1. How to winterize a 4 stroke outboard motor correctly?
To winterize a 4-stroke outboard, follow the manufacturer’s storage procedure, stabilize fuel when recommended, change engine oil and the filter, flush the cooling system, protect against corrosion, inspect gearcase lubricant, service the propeller and battery, and store the motor in the recommended position.
2. Do you need to change the oil before storing a 4-stroke outboard?
When the manufacturer’s maintenance schedule recommends an oil change before extended storage, it is good practice to complete it before putting the engine away. Always use the specified oil and filter.
3. Should I use fuel stabilizer in a 4-stroke outboard?
Fuel stabilizer may be recommended for extended storage, but the correct product and procedure depend on the engine and fuel system. Follow the owner’s manual and stabilizer manufacturer’s instructions.
4. Should a 4-stroke outboard be stored vertically?
Storage position depends on the engine design and manufacturer’s instructions. In freezing conditions, correct positioning can be particularly important because the engine needs to drain appropriately.
5. Do I need to fog a 4-stroke outboard?
Not every modern four-stroke outboard uses the same internal storage-protection procedure. Some manufacturers specify a particular method or product, while others have different recommendations. Always follow the engine’s manual.
6. Can I leave the battery connected during winter?
The correct approach depends on the boat, battery, storage environment, and manufacturer’s recommendations. Some owners disconnect or remove the battery, while others use an appropriate battery maintainer.
7. What should I check in the gearcase before winter storage?
Inspect the drained lubricant for unusual color, cloudiness, water contamination, or metal debris. Check the gearcase for leaks and replace lubricant according to the manufacturer’s service schedule.
8. How do I know if my outboard was winterized properly?
A properly prepared outboard should have its required maintenance completed, fuel handled appropriately, cooling passages flushed, corrosion protection addressed, gearcase inspected, battery maintained, and engine stored according to manufacturer instructions.
Conclusion
Learning how to winterize a 4-stroke outboard motor is one of the most useful seasonal maintenance skills a boat owner can develop. A few hours of careful preparation can help you identify problems before storage, protect important engine components, and make spring startup much less stressful.
The key steps include following the manufacturer’s storage instructions, preparing the fuel system correctly, changing engine oil and the filter when required, flushing the cooling system, protecting against corrosion, checking gearcase lubricant, inspecting the propeller, maintaining the battery, and storing the engine in the correct position.
Remember that no generic winterization guide can replace the owner’s manual for your specific outboard. Manufacturers can use different oil specifications, storage procedures, corrosion-protection methods, and requirements for fuel and batteries.
If you are unsure about an important service procedure, especially one involving internal engine protection, fuel-system problems, electrical faults, or gearcase leaks, consider using a qualified marine technician.
The goal of how to winterize a 4 stroke
is not simply to put the engine away for the season. It is to store it in a condition that gives you the best chance of returning to the water with a clean, properly maintained, ready-to-run engine.
